A closer look at the first steps of the Cape Hatteras Lighthouse restoration
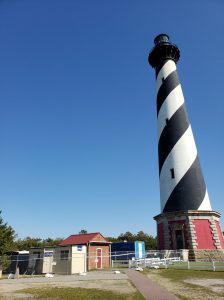
Climbing at the Cape Hatteras Lighthouse may be suspended until late summer, but when visitors return, they’ll be greeted by a fresh new interior that belies the lighthouse’s 151 years of operation.
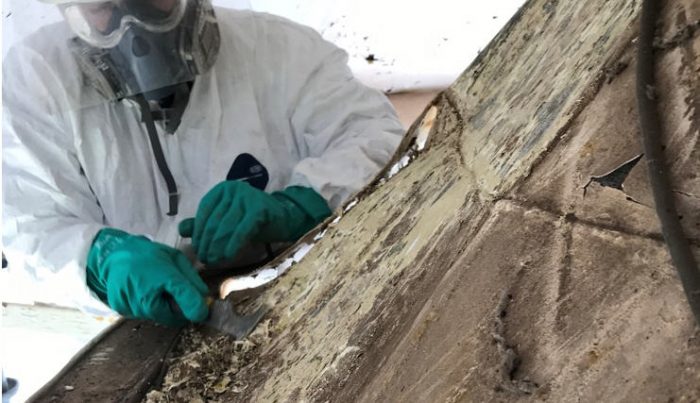
While the exterior of the Cape Hatteras Lighthouse is currently quiet, with a few temporary barricades set up to prevent visitors from entering the site, the inside of the lighthouse is humming with activity. A team of historical architects and engineers, along with personnel from the State Historic Preservation Office and the Cape Hatteras National Seashore, are continuing to review the lighthouse’s condition and determine the best next steps, while workers from Heritage Contracting of Chesapeake, Virginia, have already started the difficult process of removing more than a century of paint from the 12-story structure.
Paint removal isn’t typically a labor-intensive venture for most remodeling projects, but at the Cape Hatteras Lighthouse, which has seen layers of brushstrokes over the past century and a half, (with some materials that are now classified as hazardous), the project requires a lot more attention to detail.
It’s not entirely clear when the inside of the lighthouse was first painted, or when subsequent coats were added – some of them lead-based.
It’s also not entirely clear when similar projects may have taken place in the past, although the multiple layers of paint suggest that previous remodeling projects have happened more than once. “Some of the original paint may have been removed in the 1970s, but we are not entirely sure,” said Mark Dowdle, Deputy Superintendent of the National Park Service (NPS) Outer Banks Group. “There is limited historical documentation on [maintenance] projects in the past, or when the paint was applied.”
Even so, this new restoration project, which includes a long list of items that need to be addressed per a 2014 Comprehensive Condition Assessment Report and a 2016 Historic Structure Report, is leaving nothing to chance.
Workers don hazmat suits before entering the lighthouse to focus on paint removal efforts, and change out of the suits in a trailer that has been set up just a few feet away from the lighthouse’s entrance. The delicate balance of finding safe ways to remove hazardous materials without damaging the historic integrity of the structure is always at play, and there’s a long and detail-oriented process in the works to reach a point where a new coat of paint can be applied.
Simply put, the steps to removing paint on a more than 150-year-old historical icon are numerous, but it starts with understanding the surfaces you are working with.
There are similar processes used in paint removal on both masonry and metal surfaces, but there are also a few differences. Plastic scrapers and bristle brushes are used when removing paint from brick to ensure the historic surfaces are not damaged. Meanwhile, metal scrapers and wire brushes are used to tackle the metal components, which are inherently a lot tougher when it comes to paint removal.
These scrapers and brushes, dipped with chemical strippers, are utilized instead of other common processes, (like sandblasting), because they are less likely to damage the historic surfaces. Modern chemical strippers are formulated to be biodegradable, which makes them less harmful to the material under the paint, as well as the crews using them.
Multiple precautions are taken to collect and dispose of the old paint, and the removal crews wear special clothing and respirators to protect them from any hazardous materials that may exist, (such as those older layers of paint that may contain lead).
Although there is a general routine for paint removal, there are always cases of the unexpected, (especially when working on historic structures), which require adjustments in the varying chemicals, tools, or set-time for the chemicals.
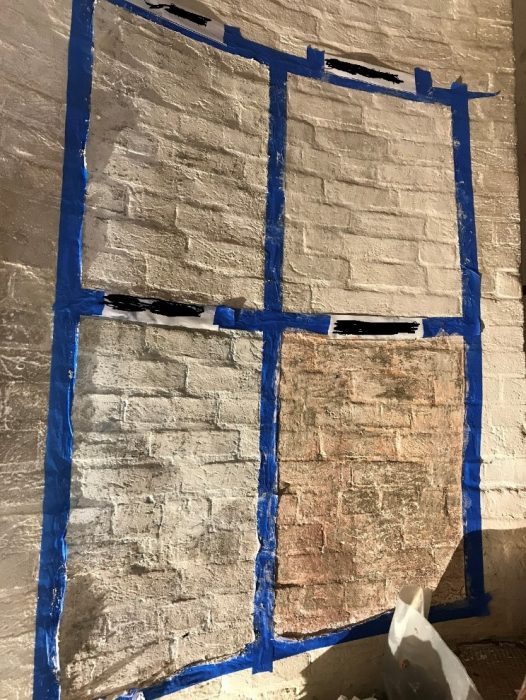
The first step is to pick an area to test how well different chemicals work on the paint being removed. In the photo above, four different chemicals were tested.
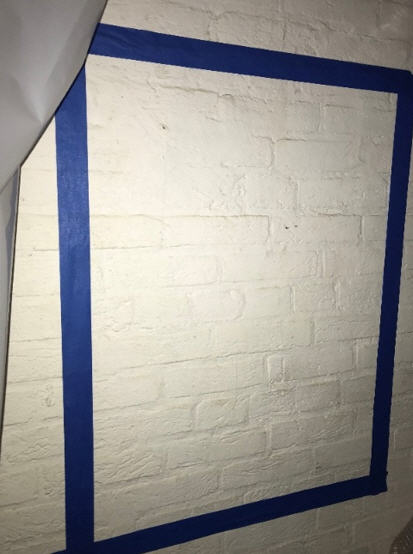
After selecting the best chemical, a “mockup” is performed. A mockup consists of selecting an area that is a good sample of the overall project, and the whole paint removal process is performed to ensure it is effective. If the test is successful, this mockup then becomes the standard for the rest of the project.
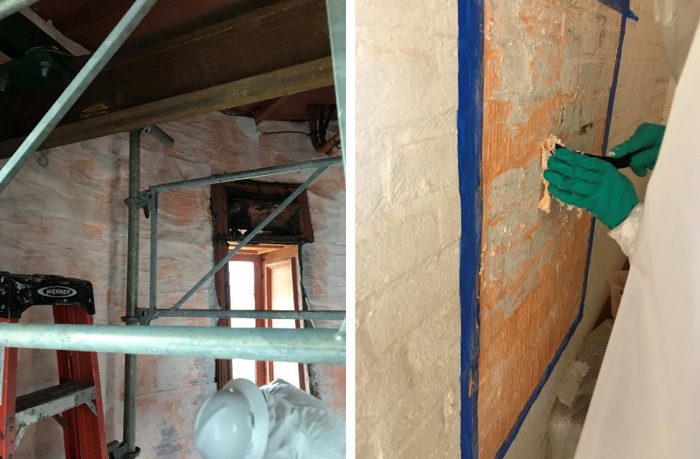
After the first coat of paint stripper is applied, a paper covering is put on top to slow the evaporation of the stripper, and to allow it to penetrate the paint. After waiting around 18 hours, the paper is removed, and the softened paint is scraped off with a plastic scraper. This process is repeated 3-5 times until any remaining paint has completely disappeared.
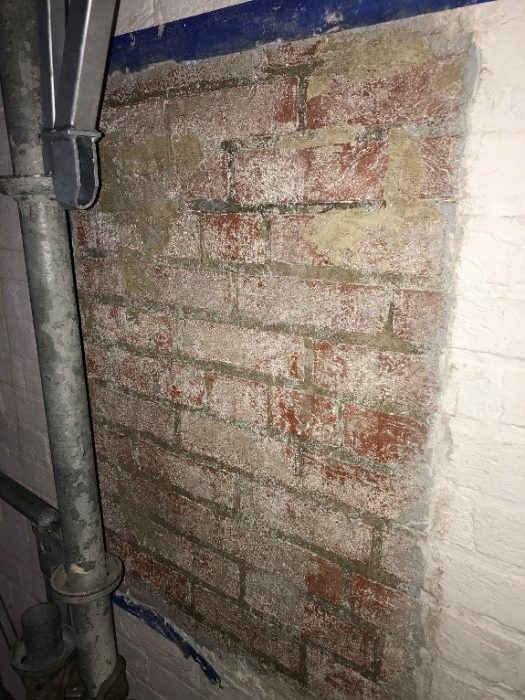
The photo above shows the original mockup after three coats of stripper have been applied. After this step, a water wash is used to neutralize the stripper, and then the area if power-washed to remove any loose, remaining material. The photo above also shows some of the project’s unexpected discoveries. In this case, some suspected mastic or high-grade construction adhesive, (which is the tan-colored material in the upper left and right), is present.
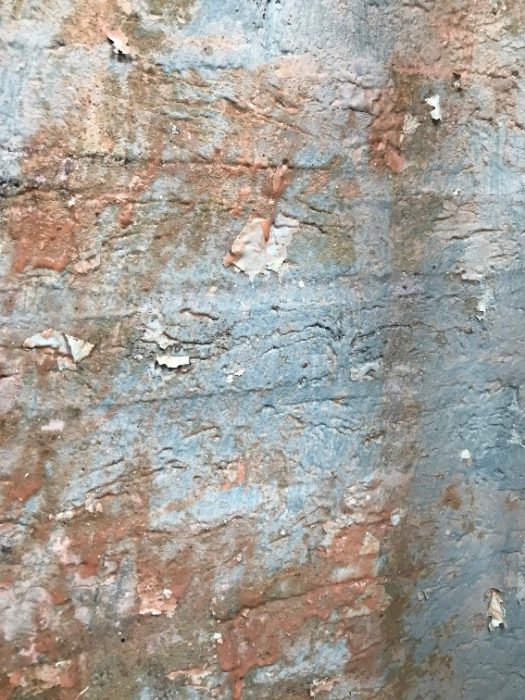
This photo above shows another unexpected result in the process as it unfolds. The orange-colored material is the stripper, and the white paint can be seen easily peeling away. At the same time, a layer of gray paint – different from the white paint – is shown to be unaffected by the stripper, and requires a different strategy. When these situations occur, a second stripper is utilized to remove the more difficult, remaining paint, and the above area required a total of five coats of stripper to create a blank canvas.
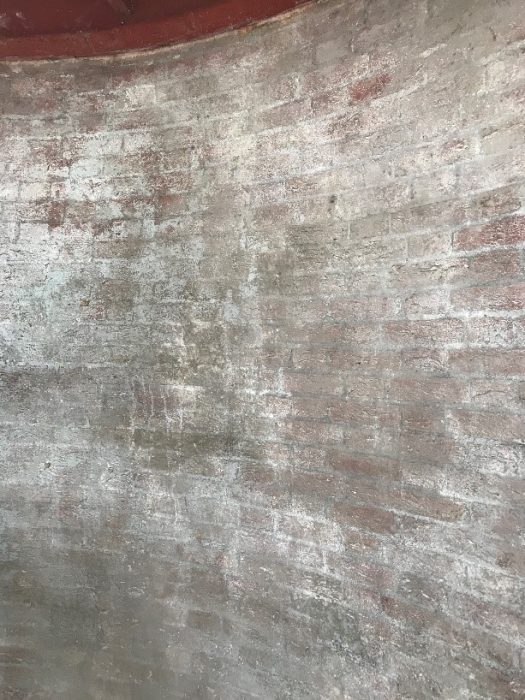
The photo above shows a wall section where the multiple layers of paint have been removed. Most of the remaining coloration on the brick could be anything from remnants of the stripping process to the remains of old whitewash from decades ago. A final power-washing will remove most of whatever material is left.
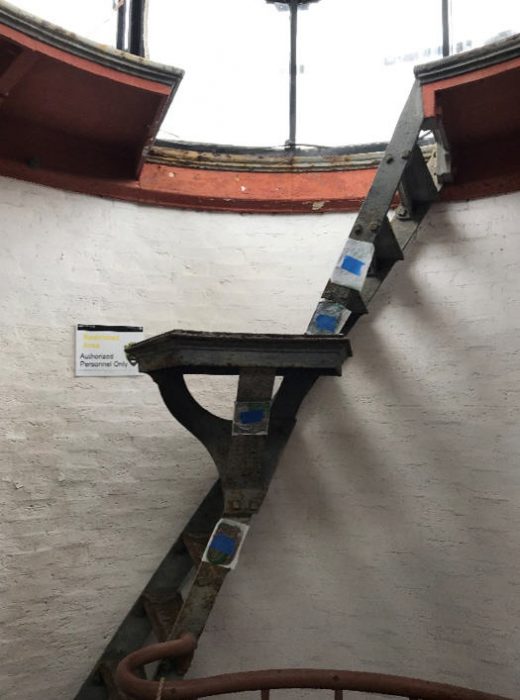
The processes that are used on brick surfaces are also repeated on metal surfaces. In the photo above of the stairs leading up to the lantern, the same four chemicals used on the brick surfaces were also used for these metal components of the lighthouse’s interior.
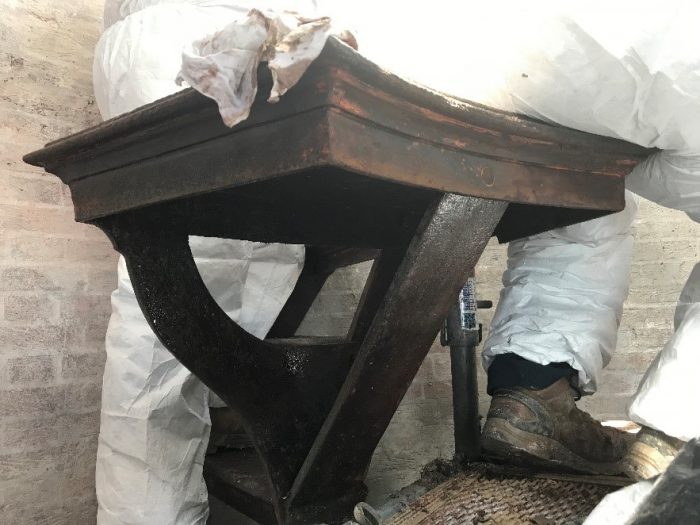
Like some areas of the masonry, some of the metal surfaces take as many as five coats of stripper until the paint is finally removed. With some small areas of detail work still to perform, the photo above shows some of the red oxide primer that was discovered under the gray paint on the ladder to the lantern room.
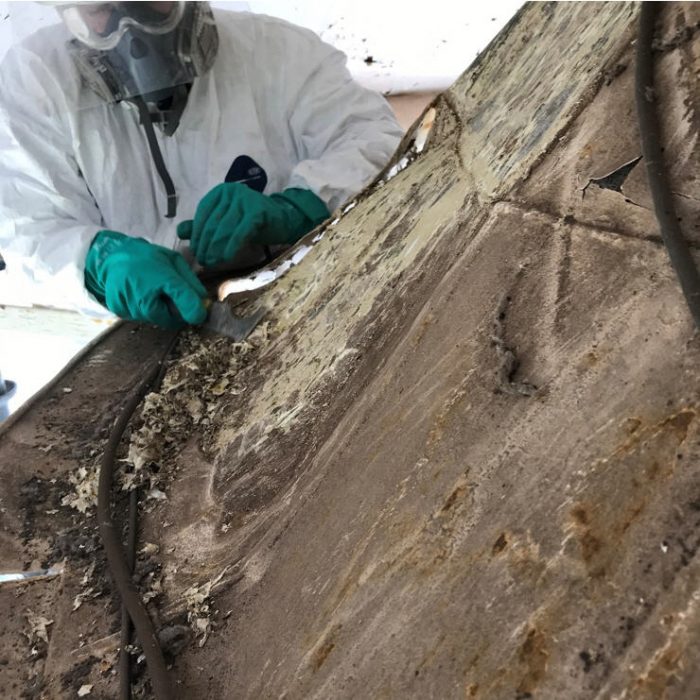
The historic lantern cone, used to direct the smoke from the oil-burning light to the outside vent, receives the same process of applying stripper, covering with paper, and repeating the process until all the paint is removed.
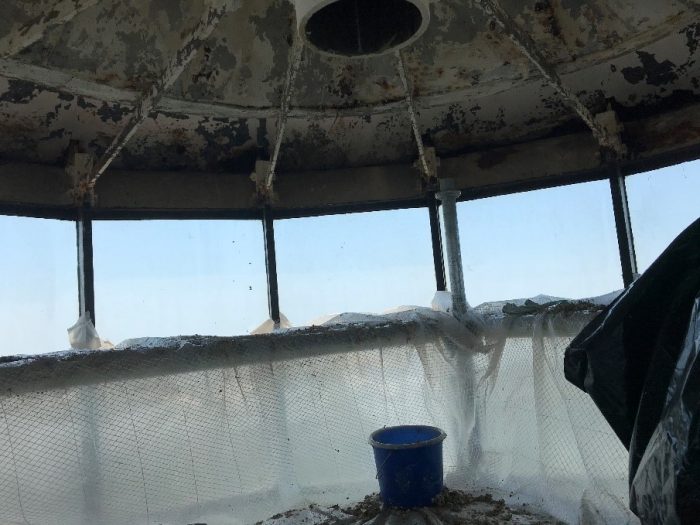
This process can also be messy, so to prevent any harm to surrounding areas, special containment measures are taken. The photo above shows reinforced plastic covering the scaffolding set up above the lighthouse light that is then taped to the windows. This prevents any stripper or contaminated paint from falling to the landings and stairs below.
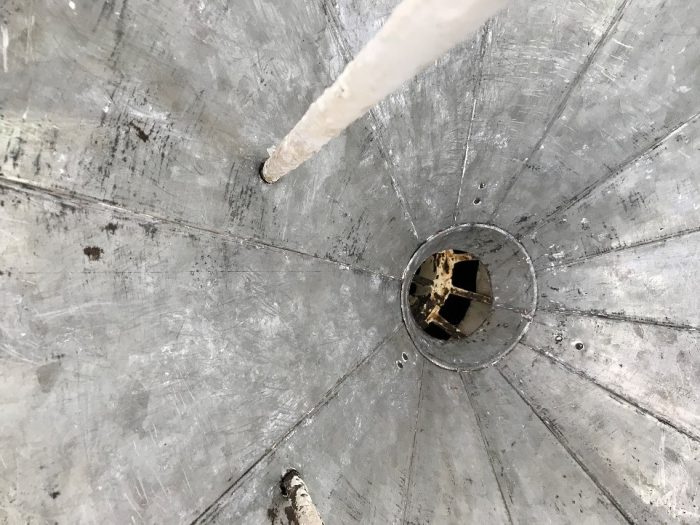
After four coats of stripper, the photo above shows the underside of the cone, totally stripped of paint, with just some residue to be washed off.
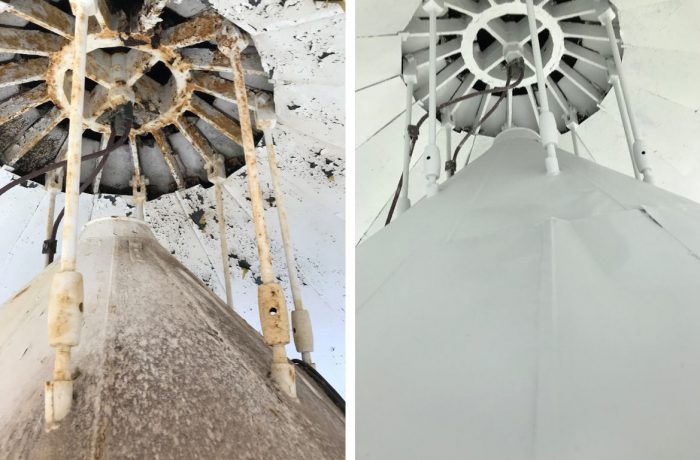
Once the entire paint removal phase is complete, a white primer is applied in order to protect the metal until the next phase of the restoration project, where a final finish coat will be added. The photo on the left shows what the lantern cone looked like at the beginning of the project, and the photo on the right shows what it looks like after stripping and a fresh coat of white primer paint has been applied.
The full project to restore the lighthouse will take approximately a year to complete, which is not surprising considering how much work is involved in removing the paint alone.
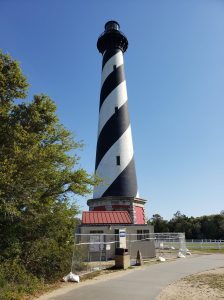
After the paint removal is fully complete, and all hazardous materials have been removed, there is a possibility of implementing a short lighthouse climbing season later this summer. Progress with paint removal and COVID-19 safety requirements will be considered, and the National Park Service will provide an update on the potential for climbing in May.
In the meantime, as the delicate and detail-oriented work continues, the public can continue to keep tabs on the ongoing project. A recently launched webpage, https://www.nps.gov/caha/learn/news/cape-hatteras-lighthouse-restoration-project.htm, has been established, which provides updates on how the work is progressing, and what comes next.
There are a lot of other tasks on the horizon, too. In addition to the new paint job, the project also includes repairs to deteriorated masonry, metal components, windows, marble flooring, and the lantern itself. Important architectural components, including missing pediments over the lighthouse windows and missing interior doors, will also be restored during the restoration project.
But with work already well underway, and multiple precautions being taken to maintain the historic integrity of Hatteras Island’s most famous structure, the public can rest assured that when the lighthouse does reopen, it will be brighter and better than ever.










A great effort and an informative article. I’ll be watching with interest. It’s wonderful the missing pediments will be restored (or replaced with lighter weight pieces)…….it will all help to return our lighthouse to some of her former glory. Her soul is still missing…….the Fresnel lens. Maybe someday it will be restored, as well.
For sure! The lens is in the Graveyard of the Atlantic Museum, but I have no idea of the cost or difficulty of repairing/restoring it to functional status. As long as they don’t put a LED bulb at the top like they did at Cape Lookout!
Have they not heard of media blasting? Whoever decided to use chemical stripper added time, complexity, and cost to this project.
Media blasting can range greatly in abrasiveness via media used, and penetration via the air pressure used to shoot the media out.