Island Cooking: Incorporating Indian cuisine into everyday Hatteras Island cooking
How about cookbook reviews for a change?
There are several Indian-American food writers who are introducing Indian recipes for the American cook that deliver the essence of Indian flavors in modern ways, which are far simpler than the traditional ways, but equally tasty. They are accessible to busy Americans who do not have hours and hours to spend preparing a meal, or who have multi-generational family members cooking with them.
 My favorites are Maya Kaimal and her cookbook, “Indian Flavors Every Day: Simple Recipes and Smart Techniques to Inspire” and “Modern Spice” by Monica Bhide. I also really like any book by Julie Sahni and perhaps the best if you are new to this food is “Indian Regional Classics: Fast, Fresh, and Healthy Home Cooking.”
And inspire they certainly do. I buy them, used, from Amazon. Less expensive, and who cares if they have some marks? Cookbooks, at least mine, tend to get stained or written into anyway.
Even if. like me, you are already comfortable with Indian cooking and have a pantry dedicated to herbs and spices, peppers, dals, rice, and other essentials, you will find yourself itching to start cooking creatively!
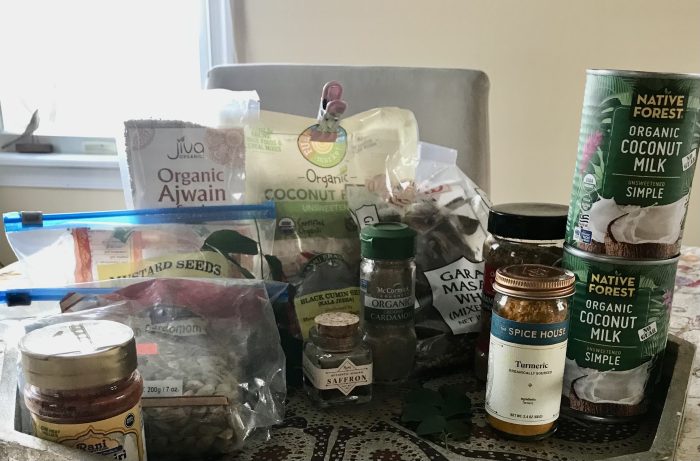
They each begin with the pantry where they introduce the wide range of flavorings that you will want to replicate with their recipes. Included are storage suggestions and alternatives, if necessary. They also include a list of online resources. I have found that many ingredients are also available on Amazon and Etsy.
I have always loved going to grocery stores and markets wherever in the world I am, and when I visit my sister in Jacksonville, Florida I spends hours and hours wandering through some great nearby Indian grocery stores and load up. If you go where there are Indian markets, visit one and immerse yourself. It may be overwhelming at first, but take your time. Sniff and let it be inspirational.
There is a section in the books on “Useful Tools” but you will find you probably have what you need. It is fun to cook with authentic implements, (I have a few because I am a kitchen nerd), but not necessary. A good nonstick pan is very useful. The dry spice rubs stick to other pans and can easily burn and be difficult to clean.
The cookbooks include essential recipes for tarkas, sauces, marinades, and masalas. However, if it is too intimidating, do not hesitate to purchase commercial blends. A lot of Indian cooks, including the authors, do, and Maya Kaimal has a line available in selected stores. See www.mayakaimal.com.
I would like to introduce you to just a few recipes from these books that should be easy for those not familiar with Indian food and cooking. Please try them and let me know if you need help. I have a lot of ingredients that I am happy to share to get you started on a healthy and sensational taste journey.
Don’t be intimidated by new spices. They are increasingly available, even on Hatteras Island! And remember if Conner’s doesn’t have them, ask, and they will try to order for you.
You can also depend on our friendly, reliable UPS drivers to deliver it to your door. Hint: you may want to leave a package of dog treats for them since they are so generous to our pooches – out of their own pockets, too.
I like to use raw spices because I love the process and the fragrances they produce, and have the time to use them now. If you choose that route, be sure to read the instructions for their use. They may need to be carefully heated and ground before adding to the dish.
But there are wonderful, prepared masalas and sauces available, and to be honest, many Indian cooks use them as they, too, are busy and don’t have staff-filled kitchens like their mothers and grandmothers. While respecting tradition, they are also adapting the recipes to shine Indian-style dishes in a modern light as you will see in the books I mentioned.
So, give it a go!
The trawlers are still coming in with fresh shrimp and the fish houses and markets have frozen shrimp available too. So, let’s ease you in with something familiar, with just a few “strange” spices!
SHRIMP IN GREEN-MANGO BUTTER SAUCE
- 31/2 tablespoons ghee (clarified butter, very useful in other recipes) or unsalted butter
- 1/2 teaspoon vegetable oil
- 1 teaspoon black mustard seeds
- 10 fresh kari leaves (curry leaves). You can order online or, like me, grow the plant. I am happy to share leaves with you. Order fresh but not dried – no flavor. These are not the common “ curry plant,” but rather Sweet Neem or Murraya Koenigii. One source is ranibrand.com. For plants, Kumar’s Garden on Etsy.
- 4-6 shallots, thinly sliced
- 2 garlic cloves, thinly sliced
- 1/2 teaspoon turmeric
- 1/4 teaspoon kosher salt
- 1/2 teaspoon coarsely ground black pepper
- 1/4 cup chicken broth (I recommend Anne’s Old Fashioned Chicken Base at Conner’s)
- 1 1/2 pounds jumbo shrimp, peeled and deveined
- 1 cup diced peeled green (unripe) mango
- 1 teaspoon sugar
- 1/2 cup water
- Half a fresh lemon
- Heat 2 1/2 tablespoons of the ghee and the oil in a heavy-bottomed saucepan until the foam subsides. Add the mustard seeds and kari leaves and sauté just until the mustard seeds pop.
- Add the shallots and garlic and sauté until aromatic and golden, 2-3 minutes.
- Add the turmeric, salt, pepper, broth, and shrimp and simmer for a few minutes, until the shrimp are almost cooked through. Remove from heat.
- In a medium skillet (If you can, consider the family-owned Lodge enameled cast iron skillet on Amazon), melt the remaining 1 tablespoon ghee over medium heat. Add the mango and sugar and sauté for 1 minute. Add the water and bring to a boil. Cook for 5-7 minutes, until the mango starts to soften.
- Transfer the mango mixture to the saucepan containing the shrimp. Mix well. Reheat gently.
- Serve hot with a squeeze of fresh lemon juice with naan bread or basmati rice.
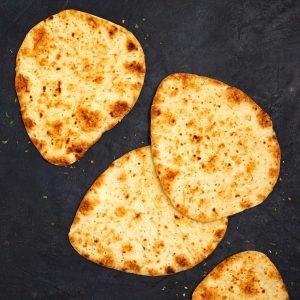 NAAN
NAAN
- 1 cup warm water
- 2 teaspoons sugar
- 1 (1/4 ounce) packet active dry yeast (2 1/4 teaspoons)
- 2 tablespoons plain whole milk yogurt
- 1/3 cup whole milk
- 1 teaspoon fine sea salt
- 3 cups + 2 tablespoons unbleached all-purpose flour, plus more for dusting
FOR THE TOPPINGS
- 4 teaspoons nigella seeds or black cumin seeds
- 4 medium garlic cloves, minced
- 1/2 cup chopped cilantro leaves and tender stems
- Fine sea salt
- Freshly ground black pepper
- 1/4 cup melted ghee
- Place the water in a large bowl. Stir in the sugar, then the yeast and let sit until the yeast “blooms,” creating a foamy layer on the surface, about 10 minutes.
- Stir in the yogurt, milk, and salt, then slowly add 2 3/4 cups of the flour, working it with your hands. Or you can mix it in a stand mixer with a dough hook. If mixture is very sticky, add an additional 1/4 cup of flour (or more), 1 tablespoon at a time, until you have a soft but still slightly sticky dough.
- Shape the dough into a ball, and cover with dish towel. Turn oven on to lowest setting (200F) and when it reaches 100F, turn off the oven. Place the bowl of dough in the oven and let it rise until doubled, 1 to 1 1/2 hours.
- Punch the dough gently, transfer to floured work surface, and cut into 8 equal-size pieces. Form into balls and let relax for 15 minutes.
- Lightly sprinkle work surface and surface of the dough with flour and roll out oblong shapes about 8 inches long x 1/4 inch thick. If the dough is sticking, add more flour as you roll it out.
- Sprinkle the dough oblongs with a generous pinch of the toppings and give it a quick roll to cement the toppings into the dough.
- Place plain side down in a hot skillet. After about 30 seconds the dough will bubble. Cook until the bottom is very brown with some burnt spots on it, about 2 minutes. Using tongs, carefully flip the dough and cook, pressing slightly, so the dough browns and the toppings cook evenly, 1 – 1 1/2 minutes. Transfer to a serving dish, topping side up, and brush with melted ghee. Repeat with remaining dough. Keep warm in oven.
RADISH RAITA WITH TOASTED CUMIN
- 8-10 radishes
- 1 1/2 cups plain whole milk yogurt
- 1 garlic clove, minced
- 1/2 medium red onion, minced ( about 1/4 cup)
- 1 teaspoon minced Serrano or jalapeño
- Pinch of cayenne
- Pinch of freshly ground black pepper
- 1/2 teaspoon fine sea salt
- Trim the radishes. Reserve a few small leaves for garnish. Rinse well and pat dry. Cut 1 of the radishes into matchsticks for garnish. Set aside. Grate the remaining radishes on the coarse holes of a box grater, about 1 cup.
- Place the yogurt in a medium bowl. Add grated radishes, garlic, onion, green chili, cumin, cayenne, black pepper, and salt. Mix well. Taste for seasoning and adjust if necessary. Cover and refrigerate.
- Just before serving, give the raita a good stir, then sprinkle with the radish matchsticks and reserved leaves.
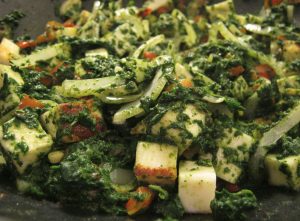 SAAG PANEER
- 1/2 cup plain-whole milk yogurt
- 1/2 teaspoon cornstarch
- Kosher salt
- 1 pound fresh spinach, tough stems removed, washed
TARKA
- 2 tablespoons neutral oil
- 1 teaspoon cumin seeds
- 1 medium yellow onion, chopped medium (1 cup)
- 3 garlic cloves, thinly sliced
- 1 tablespoon minced ginger
- 1 teaspoon minced Serrano OR 2 teaspoons minced jalapeños
- 1 teaspoon ground cumin
- 1/2 teaspoon ground turmeric
- 1/4 teaspoon freshly ground black pepper
- 1/4 teaspoon cayenne
- 1 teaspoon fine sea salt
- 1 1/2 – 1 3/4 cups water, plus more as needed
- 1/4 teaspoon North Indian Garam masala
- 1 teaspoon fresh lemon juice
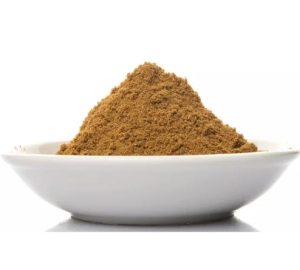 GARAM MASALA
- 2 tablespoons freshly ground black pepper
- 2 tablespoons ground cinnamon
- 2 tablespoons ground cloves
- 2 tablespoons ground cardamom
NOTE: Commercial Garam Masala is widely available but some contain significant amounts of cumin and coriander which will give you a different flavor result and won’t deliver the same warm-sweet taste of this recipe.
Combine all the spices and mix thoroughly. Store in an airtight jar and store away from the light for up to a year.
- In a small bowl, whisk together the yogurt and the cornstarch. Set aside.
- Bring a 5-quart pot of salted water to a rolling boil. Set a bowl of ice water next to the stove. Place a colander in the sink.
- Transfer all the spinach to the pot, submerging the leaves completely for about 45 seconds. Using tongs or a slotted spoon, transfer the spinach to the ice water bath to quickly cool and lock in the color.
- After a few minutes, transfer the spinach to the colander and press to remove excess liquid. There will still be some water in the spinach, which is fine. Set aside.
- Fry the paneer
- Make the tarka. Assemble your prepped and measured ingredients by the stove.
- Using the same skillet you used to fry the paneer, heat the oil over medium-high heat. Add the cumin seeds and, after a few seconds, add the onion and cook, stirring often, until golden- brown, 6-8 minutes. If there are still some paneer bits in the skillet, scrape them up as you cook the onion.
- Add the garlic, ginger, and green chili and stir constantly until they lose some of their sharp fragrance and the garlic begins to turn translucent, about 2 minutes.
- Reduce the heat to medium and add the masala – coriander, cumin, turmeric, black pepper, cayenne, and salt – and cook, stirring constantly, until the spices lose their raw smell, about 1 minute.
- Add 1 cup of the water and stir to loosen up the spices and any bits stuck to the bottom of the pan.
- Add the spinach and combine well with the other ingredients. Add 1/4 cup of water and continue cooking and stirring until the spices meld with the spinach, about 5 minutes.
- Transfer the spinach mixture to a food processor, add 1/2 cup of water, and pulse until it resembles a coarse pesto.
- Return it to the skillet over medium heat. Stir in the yogurt-cornstarch mixture and add the remaining 1/2-3/4 cup water to get a thick but pourable consistency. Cook until hot, then add garam masala and lemon juice. Adjust the water if the mixture is very thick.
- Add the paneer, stirring gently until everything is warmed through, 4-5 minutes.
- Alternatively, serve the paneer on top of the hot spinach for a prettier presentation. But transfer the spinach to a warm serving bowl before you add the paneer.
- Serve with naan or basmati rice.
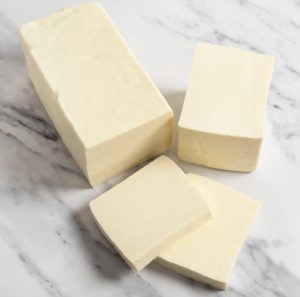 HOMEMADE PANEER (CHEESE)
- 2 quarts whole milk
- 4 tablespoons fresh lemon juice
- Heat milk in large saucepan over medium high heat until the top becomes foamy, just as it looks about to boil
- Turn stove off. Add lemon juice and stir for 1 minute. The milk should begin to curdle. If it doesn’t, turn stove back on and bring to a gentle boil until the solids separate.
- Line a strainer or colander with 2 layers of cheesecloth and place over a deep bowl.
- Ladle in 1/2 of the curdled milk, then pour the rest in. Leave until all the liquids drain. This could take 5 x 10minutes.
- Discard liquid (whey) in the bowl. Bundle the paneer up in the cheesecloth (it will still be quite watery at this stage) then rinse bundle briefly under cool water. This helps remove the lemon flavor and cools it for easier handling.
- Squeeze out excess water by twisting the cheesecloth and squeezing the bundle, but not so hard that the paneer squeezes out through the cloth. Once liquid no longer comes out, stop. The paneer will still be quite soft at this point.
- Shape into a disc around 3/4 inch thick, still in the cheesecloth. Place in strainer or colander set over a bowl. Top with a small plate and 2 14 oz. cans.
- Refrigerate 4 hours while the paneer sets and the remaining liquid drains it.
- Remove from fridge and carefully unwrap. There will be a dent in the middle from the draining – normal.
- Ready to use or store in fridge for up to 2 weeks or in fridge for 3 months.
GOLDEN PAN-FRIED PANEER
- Cut paneer into 1/2 inch thick slices.cut each slice into 1 4/5 x 1/2 inch pieces.
- Melt ghee in non-stick pan over medium-high heat.
- Place half the paneer in the pan and cook for about 2 minutes, then turn and cook until the pieces are golden and crispy.
- Remove onto paper towel-lined plate. Repeat with remaining paneer and ghee.
CARAMELIZED SPICED PINEAPPLE WITH WHIPPED COCONUT CREAM
WHIPPED COCONUT CREAM
- 1 (14 ounce) can full-fat coconut milk, organic with no additives or emulsifiers, chilled minimum 3 hours, but not frozen
- 1teaspoon granulated sugar
- 1/4 teaspoon vanilla extract
TOASTED COCONUT
- 1/4 cup dried unsweetened shredded coconut
PINEAPPLE
- 1 ripe pineapple (1 3/4 pounds), peeled
- 2 tablespoons ghee or unsalted butter
- 1/2 teaspoon ground ginger
- 1/4 teaspoon ground cinnamon
- Pinch ground cloves
- 1/4 teaspoon ground cardamom
- 1/3 cup firmly packed dark brown sugar
- Open the can of chilled coconut milk and carefully scoop out the solidified fat (reserving the watery portion in the can) and place it in a bowl. Add the granulated sugar, vanilla, and 1 teaspoon of the reserved liquid in the can.
- Whip on high until it hold soft peaks. It won’t be as voluminous as whipped cream. If it seems too stiff, add more of the coconut water in the can, a teaspoon at a time. Cover and refrigerate.
- Put the shredded coconut in an 8 inch skillet over medium heat. Stir constantly until the flakes become a nice toasty orange-brown color, 3-5 minutes. Do not leave the skillet. It can burn quickly. Transfer to a plate to immediately stop the browning. Set aside. Wipe the skillet clean for later use.
- Line a half-sheet pan with aluminum foil. Cut the peeled pineapple lengthwise into quarters. Slice out the tough core, then cut each quarter into 3 long wedges and arrange on the foil.
- Preheat broiler and arrange the rack 4 inches from the heat source.
- Place the skillet you used for toasting the coconut over medium heat and melt the ghee. Stir in the ground spices and let them cook and bubble for 1 minute. Remove the pan from the heat.
- Brush the tops of each pineapple wedge with half of the spiced ghee. Divide the remaining half brown sugar among the wedges, patting equal amounts onto each one. Don’t be concerned if some of the sugar falls off. Broil the pineapple wedges until golden and beginning to caramelize at the edges, about 3-5 minutes.
- Remove the baking sheet from the oven and use tongs to flip the wedges and brush with remaining spiced ghee. Pat brown sugar onto the wedges and return to broiler until the pineapple begins to caramelize, 3-4 additional minutes. Transfer to a platter and set aside to coo to room temp.
- To serve, spoon dollops of whipped coconut cream on the wedges and sprinkle with toasted coconut. Serve with the remaining coconut cream and toasted coconut on the side.


